
These Best 5 Ways Of Painting Kitchen Furniture can help in Transforming the look of your kitchen furniture through painting can breathe new life into your space and provide a fresh update to your décor.
Here are Best 5 Ways Of Painting Kitchen Furniture:
Prep the Surface: Achieve a Flawless Finish
When it comes to painting furniture, the key to achieving a flawless and long-lasting finish lies in properly preparing the surface. A thorough cleaning, removal of dirt and grime, and addressing any imperfections or rough patches are crucial steps to ensure a smooth base that will allow the paint to adhere properly. So, before you start transforming that old piece of furniture into a stunning focal point, make sure to follow these essential steps to prep the surface.

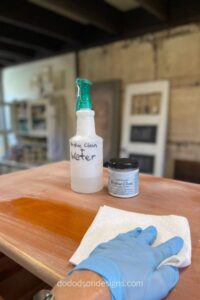
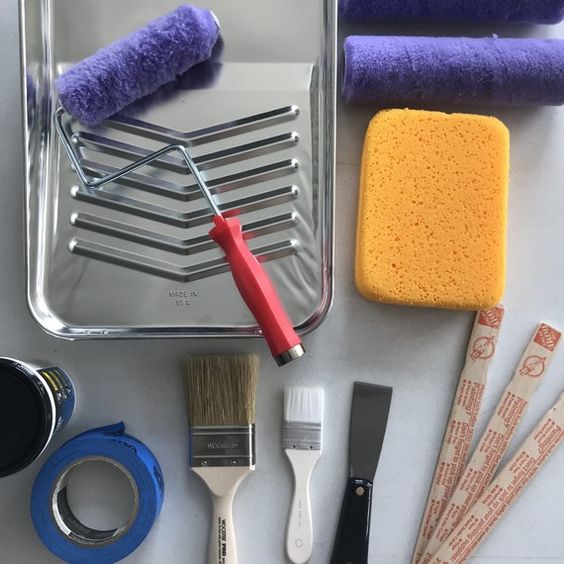
1. Gather Your Tools
Before diving into the surface preparation, gather all the necessary tools to make the process more efficient. You’ll need a mild soap, water, a cloth or sponge for cleaning, sandpaper or a sanding block, and a clean, dry cloth for drying the surface. Additionally, make sure to wear appropriate protective gear such as gloves and goggles when working with cleaning agents or sanding materials.

2. Begin with Cleaning
Start by thoroughly cleaning the surface of the furniture. Dirt, grease, and grime can build up over time, making it difficult for the paint to adhere properly. Use a mild soap and water solution to remove any dirt or grime. Dip a cloth or sponge into the solution and gently scrub the surface, ensuring that you cover all areas. Pay special attention to corners, crevices, and intricate details. Rinse with clean water and allow the surface to dry completely before moving on to the next step.
3. Sanding for a Smooth Base
After the surface has dried, inspect it for imperfections or rough patches. Sanding is an essential step to create a smooth base that will result in a professional-looking finish. Use sandpaper or a sanding block with medium-grit (around 120 grit) to gently sand the entire surface. This process helps to remove any existing paint, roughness, or unevenness. Ensure that you sand evenly, applying light pressure in a circular or back-and-forth motion, until the surface feels smooth to the touch. Be cautious not to oversand as it could damage the furniture.

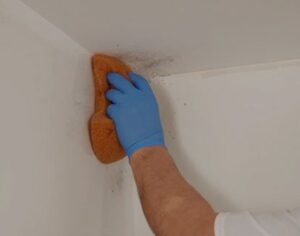
4. Remove Dust
Once you’ve finished sanding, it’s crucial to remove any residual dust or particles before applying paint. Use a clean, dry cloth or a tack cloth to wipe away all debris from the surface. This step is essential because dust particles can affect the finish and create an uneven appearance if left untouched.
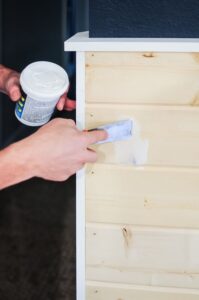
5. Addressing Imperfections
If there are any noticeable imperfections like holes, scratches, or dents on the furniture, it’s vital to address them before painting. Depending on the severity of the imperfections, you can use wood filler, putty, or spackle to fill in the gaps or holes. Apply the chosen product with a putty knife, ensuring it is evenly spread over the imperfection. Allow it to dry completely before sanding lightly to achieve a smooth surface. Remember to remove any dust after sanding.
6. Final Cleaning
To ensure the surface is pristine and ready for painting, give it a final cleaning. Use a clean, damp cloth to wipe away any remaining dust or debris from the surface. Check for any missed spots or areas that require additional sanding or cleaning.

By thoroughly prepping the surface, you create an ideal canvas for paint application. A clean, smooth surface ensures better paint adhesion and maximizes the durability of the finish. This step is essential for a professional-looking outcome, whether you plan to use a traditional or bold, vibrant color on your furniture.
Taking the time to properly prep the surface before painting pays off in terms of the quality and longevity of your painted furniture. It sets the stage for a successful and rewarding DIY project that transforms tired, worn-out furniture into a piece that adds charm and character to your living space.
Frequently Asked Questions (FAQs) about the Best 5 Ways Of Painting Kitchen Furniture:
Q: Do I need to sand my kitchen furniture before painting?
A: Yes, sanding your kitchen furniture before painting is essential to create a smooth surface and ensure better adhesion of the paint. Sanding helps remove any existing finish, dirt, or imperfections, resulting in a better-quality paint job.
Q: What type of paint is best for kitchen furniture?
A: Opt for high-quality paint specifically formulated for use on furniture and kitchen surfaces. Look for paints labeled as durable, washable, and suitable for high-traffic areas. Acrylic or latex paints are popular choices for kitchen furniture due to their durability and ease of use.
Q: How many coats of paint should I apply to my kitchen furniture?
A: It’s recommended to apply multiple thin coats of paint rather than one thick coat. Typically, two to three coats of paint are sufficient to achieve full coverage and a smooth finish. Allow each coat to dry completely before applying the next one.
Q: Should I use a primer before painting my kitchen furniture?
A: Using a primer before painting your kitchen furniture is advisable, especially if the furniture has a glossy finish or if you’re painting over a dark color. A primer helps improve paint adhesion, enhances color coverage, and promotes better durability of the final paint job.
Q: How can I protect my painted kitchen furniture from damage?
A: To protect your painted kitchen furniture from damage, apply a clear topcoat or sealer specifically designed for painted surfaces. This protective layer helps guard against scratches, stains, and moisture damage, ensuring the longevity and durability of your paint job.
Q: Can I repaint my kitchen furniture if I don’t like the color?
A: Yes, you can repaint your kitchen furniture if you’re not satisfied with the color or finish. Simply follow the proper preparation and painting steps outlined earlier to ensure a successful repaint. Sand the surface lightly, apply a primer if necessary, and then proceed with your desired paint color.
Q: How long does it take for painted kitchen furniture to dry completely?
A: The drying time for painted kitchen furniture depends on various factors, including the type of paint used, the number of coats applied, and the environmental conditions. In general, allow each coat of paint to dry fully according to the manufacturer’s instructions before applying additional coats or handling the furniture.
Q: Can I use painted kitchen furniture immediately after painting?
A: While the paint may feel dry to the touch after a few hours, it’s advisable to wait at least 24-48 hours before using painted kitchen furniture to ensure that the paint has cured and hardened properly. This allows for maximum durability and prevents any damage to the freshly painted surface.


